ARTICHOKE:
JERUSALEM ARTICHOKE PICKLES
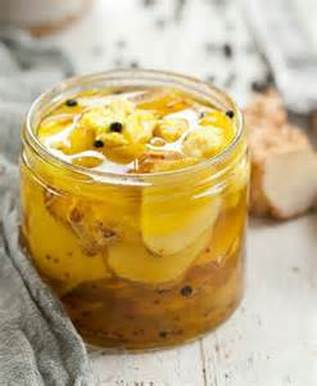
SUNCHOKE PICKLES
Jerusalem artichokes or sunchokes are not only good for you, they also make great pickles.
Plan ahead to make these at least a week before consuming.
Prep Time: 30 minutes
Cook Time: 5 minutes
Total Time: 35 minutes
INGREDIENTS:
2-1/2 pounds Jerusalem artichokes
2 Tablespoons lemon juice
1 pound cauliflower (optional)
Pickling salt
4 cups cider vinegar
1 cup white vinegar
1 cup water
2 cups sugar
1-1/2 teaspoons celery seeds
1-1/2 teaspoons turmeric
2 teaspoons mustard seeds
1-1/2 teaspoons dry mustard
1 large green pepper
1 large red pepper
1 large onion
PREPARATIONS:
Peel and cut the Jerusalem artichokes into 1/2-inch chunks and drop into water acidulated with lemon juice.
Cut up the head of cauliflower, break flowerets into 1/2-inch pieces, and peel and cut the stems into 1/2-inch cubes.
Crisp the vegetables in a brine solution made this way:
Cover the chokes and cauliflower with water to see how much water you need, then drain the vegetables, saving the water, and mix into it 1/3 cup pickling salt per quart.
Place the vegetables in this brine and soak for 24 hours.
Combine the vinegars, water, sugar, celery seeds, turmeric, mustard seeds, and dry mustard in a stainless steel or enameled saucepan and bring to a boil. Stir to dissolve sugar, reduce heat, and let simmer for 3 minutes.
Remove from heat.
While the brine is simmering, coarsely chop the peppers and onion. Drain the chokes and cauliflower, rinse them well to remove salt, and drain again.
Combine chokes, cauliflower, peppers, and onion and pack into clean hot jars, following manufacturer's directions.
Ladle in hot brine, a bit at a time, making sure it runs through the vegetables.
(Putting a long, sterilized skewer in the jar and moving it around helps the syrup flow through the vegetables.)
Fill to 1/8 inch of the jar top, seal, and process in a hot water bath for 10 minutes. Set pickles in a cool place for at least 1 week before serving.
Bron: Recipe from About.com
Plasing: Tiana Botes / WATERTAND RESEPTE VIR OUD EN JONK
BELL PEPPERS:
PICKLED BELL PEPPERS
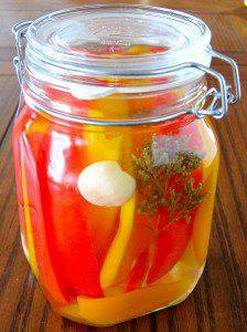
PICKLED BELL PEPPERS
INGREDIENTS:
4 red and yellow bell peppers
2 cups white wine vinegar
3/4 cup water
1 tablespoon sugar
1 teaspoon sea salt
2 cloves garlic, whole
2 springs oregano
DIRECTIONS:
Wash the peppers, remove the seeds and ribs.
Cut the peppers into 2 inch strips.
Mix the vinegar, water, sugar and salt.
Place the pepper strips, garlic and oregano in a liter or quart jar and add the liquid. Make sure the peppers are fully covered with the brine.
Seal well and let the peppers cure for at least 24 hours before eating the peppers.
Bron: Onbekend
Plasing: Tiana Botes / WATERTAND RESEPTE VIR OUD EN JONK
PICKLED CAULIFLOWER / CARROTS & RED BELL PEPPER
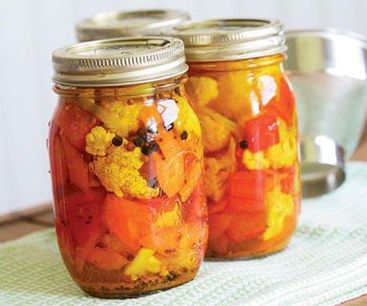
PICKLED CAULIFLOWER/CARROTS & RED BELL PEPPER
1 tsp. coriander seeds
1 tsp. black or brown mustard seeds (or substitute yellow)
1/2 tsp. cumin seeds
2 cups cider vinegar
5 medium cloves garlic, lightly crushed and peeled
Three 1/4-inch-thick slices peeled fresh ginger
One-half small yellow onion, thinly sliced lengthwise
1/2 cup sugar
2 Tbs. kosher salt
1 tsp. black peppercorns
1/2 tsp. ground turmeric
1/4 tsp. crushed red pepper flakes
One-half head cauliflower, cut into 1-1/2- to 2-inch florets (about 4 cups)
5 medium carrots, peeled and sliced 1/2 inch thick on the diagonal (about 2 cups)
One-half red bell pepper, cut into large dice (about 1 cup)
METHOD:
Put the coriander, mustard, and cumin seeds in a small saucepan. Toast the spices over medium heat, swirling the pan occasionally, until fragrant and slightly darkened, about 2 minutes. Add the vinegar, garlic, ginger, onion, sugar, salt, peppercorns, turmeric, red pepper flakes, and 1 cup water to the toasted spices. Bring to a boil.
FOR QUICK REFRIGERATOR PICKLES:
Pack the cauliflower, carrots, and bell pepper in a 2-qt. heat-resistant glass bowl or measuring cup.
Pour the hot brine over the vegetables. Let cool to room temperature and then cover and refrigerate for at least 2 and up to 14 days.
FOR CANNED PICKLES:
Pack the vegetables into clean, hot pint jars. Pour the hot brine over the vegetables, leaving 1/2-inch headspace. Remove any air bubbles by slowly raising and lowering a chopstick or a plastic blade around the inside of the jars (a trapped air bubble may shatter a jar as it heats). If you have extra brine, strain it and distribute the solids among the jars. Wipe the jars' lids with a damp cloth before putting on the lids. Secure the lids with screw bands tightened by hand. Process for 10 minutes, following the instructions in our "Canning Basics" guide.
1. Wash the jars and screw bands with hot, soapy water and rinse them well. Follow the manufacturer’s directions for preparing the lids. The jars must be hot when you pack them; otherwise, the hot brine may cause them to shatter.
2. Pack the jars tightly, and then pour in the hot brine to cover the vegetables, allowing the specified amount of headspace (the space between the rim of the jar and its contents).
3. Remove air bubbles by slowly raising and lowering a chopstick or a plastic blade around the inside of the jars. This is crucial: A trapped air bubble may shatter a jar as it heats. Add more brine to cover the vegetables, if necessary.
4. Wipe the jars’ rims with a damp cloth before putting on the lids. Secure the lids with screw bands tightened by hand into place.
5. Set the jars on a rack in a canner or pot that’s half-filled with very hot water (but not boiling, which may cause the jars to break). Add more hot water, if necessary, to cover the jars with 2 inches of water. Cover the pot, turn the heat on high, and bring the water to a boil. When it starts to boil (you’ll have to peek), begin timing—see your recipe for processing time.
6. Remove the jars immediately when the time is up. Let them cool undisturbed for at least 12 hours. Never tighten the bands after the jars have been processed, as this could break the seal.
7. Test the seals. After the jars have cooled, gently remove the screw bands and test the seals by lifting the jar by its lid. (Do this over a towel to catch the jar if it hasn’t sealed properly.)
8. Store sealed jars in a cool, dry place. Unsealed jars should be stored in the refrigerator and used quickly.
Store the pickles for at least 2 but preferably 7 days (or longer) before opening. Refrigerate after opening
Bron: Adapted from “Pickles by the Pint”
Plasing: Henriette Wessels / WATERTAND RESEPTE VIR OUD EN JONK
BEANS:
PICKLED GREEN BEANS
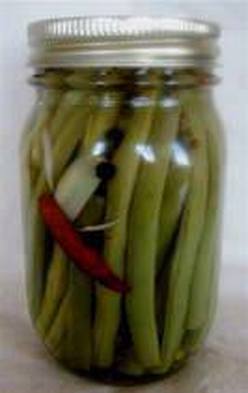
PICKLED GREEN BEANS
INGREDIENTS:
5 oz. green or wax beans
1 pint jar with lid
1 clove garlic, peeled and quartered
1/2 tsp. coriander seeds
1 small dried chile
1/8 tsp. black peppercorns
1 bay leaf
1 cup cider vinegar
1/2 cup white wine
1 Tbsp. sugar
1 tsp. salt
DIRECTIONS:
Arrange beans vertically in pint jar to see how many fit. Remove beans and trim them to fit lengthwise in jars, leaving at least 1/2 inch empty space at top of jar. Arrange trimmed beans in jar.
Stuff garlic, coriander seeds, chile, peppercorns, and bay leaf around beans.
Bring vinegar, wine, sugar, and salt to a boil and boil for 2 minutes. Pour mixture over beans. Screw on lid and let sit until cooled to room temperature. Refrigerate for 2 days or up to 6 months before eating.
Notes:
Makes 1 pint Pickled Green Beans.
These easy Pickled Green Beans are “refrigerator pickles.” They are not heat-processed and thus must be stored in the refrigerator to keep from spoiling. A flavorful, snappy pickle, they are great in salads, alongside meaty fare like braised pork, and particularly good in place of or in addition to celery in a Bloody Mary.
NOTE: This recipe is for 1 pint jar of Pickled Green Beans. The recipe easily doubles, triples, or even quadruples if your harvest is large and your fridge space ample.
Bron: Onbekend
Plasing: Tiana Botes / WATERTAND RESEPTE VIR OUD EN JONK
RENEE'S BBQ BEANS
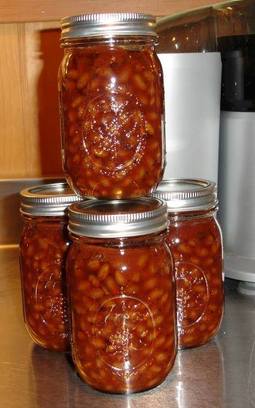
RENEE'S BBQ BEANS
Well from my previous post you know that the beans for this recipe went to a Bean and Sausage soup and the sauce turned into a fantastic barbecue sauce that will be so good on my ribs this weekend and meats over the summer.
BAKED BEANS
Navy Beans 1 lb
½ cup Leeks, chopped
2 tbsp Brown Sugar
½ cup Molasses
1 ½ tsp Mustard Powder
1 tsp Kosher Salt
1 tsp Pepper
2 cups Ketchup (Simply Heinz brand or homemade)
1 cup Maple Syrup
2 cups water
½ cup Vinegar (cider or white)
METHOD:
Add dry beans to Dutch oven and add 8 cups of water to cover. Cook on high till the beans comes to a boil for about two minutes and turn off the heat, cover and let the beans sit in the pot covered for 30 to 45 minutes. Once the beans have sat they will have absorbed a lot of the water. Drain the beans through a colander and then add 8 cups of fresh water and add the leeks. Cook the beans again for 15 minutes at a full boil.
In the meantime, in another saucepan mix 2 cups of water, molasses, vinegar, salt, pepper, ketchup, maple syrup, mustard, and brown sugar, cook to get a slow boil. It should be sweet tasting but not thick.
Sharon's final product!
Prepare 6 pint jars. Using a slotted spoon fill the jars 3/4 full of the beans and onion mixture. Once all the jars are filled ladle the sweet sauce into the jars leaving 1" headspace to leave room for expansion. Process the jars in a pressure canner at 11 pounds of pressure for 75 minute
Bron: Onbekend
Plasing: Tiana Botes / WATERTAND RESEPTE VIR OUD EN JONK
CORN:
HOMEMADE CREAMED SWEETCORN
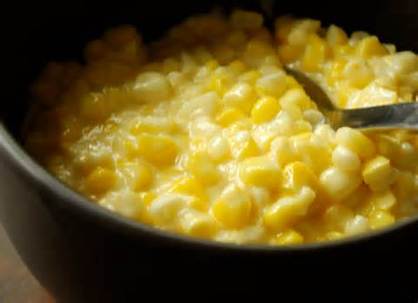
HOMEMADE CREAMED SWEETCORN
INGREDIENTS:
6-8 large cobs of cor
1 tablespoon of butter
1 small onion
(Optional: Heavy cream or half-and-half and sugar to taste)
METHOD:
Start by cutting the kernels the cobs of corn. (To make a messy job a bit less so, I place a small cutting board into a glass-baking dish, so that the kernels don’t fly everywhere.)
Then using the back of the knife, scrape the cob thoroughly to get all the “milk” out.
Heat athe butter in a saucepan and add the onion, which has been finely diced.
Sauté over medium heat for a minute or two and then cover the pan and cook until the onion is very soft. While it cooks make sure it doesn’t brown at all, if it starts to, add a few teaspoons of water.
Meanwhile, cut 2 of the empty cobs into a few pieces and place them in a small saucepan with 1-1/2 cups of water or vegetable stock and boil until the water has reduced by a 1/2 cup. Strain out the cobs and reserve the liquid.
Once the onions are very soft, add the cut corn and the cup of reserved liquid, season to taste with salt and freshly ground black pepper and cook uncovered for about 10 minutes or until the corn is tender. Place an immersion blender into the pot and blend until half the mixture is fully pureed. (If you don’t have an immersion blender – get one, you won’t be sorry – but in the meantime, remove half the corn mixture from the pot and blend until smooth in a regular blender and then add it back.) Taste and adjust the seasonings.
You can also add fresh sliced basil, mint or chives or a bit of chili powder or ground cumin. If you are looking for a more traditional creamed corn flavor, blend in some heavy cream or half and half and sugar.
Bron: Onbekend
Plasing: Tiana Botes / WATERTAND RESEPTE VIR OUD EN JONK
PICKLED CAULIFLOWER
Ingredients:
2 1/2 cup water
1 cup apple cider vinegar
1 cup rice wine vinegar
2/3 cup sugar
1/4 cup kosher salt
3 garlic cloves
1 tsp mustard seeds
2 tsp fennel seeds
1 tsp black peppercorn
1/4 tsp red pepper
8 cups cauliflower
Directions:
Bring first nine ingredients to a boil, stirring until sugar is dissolved. Remove from heat and let sit for 30 minutes.
Blanch cauliflower by steaming, in 1 cup batches, and plunging in ice water to halt cooking.
In a large bowl or container, pour vinegar mixture over vegetables. Let stand 1 hour. Chill in an airtight container in refrigerator.
**Note: If you plan to use a glass jar for storing, wait until the mixture cools or boil glass container to ensure that the mixture and the container are the same temperature when they meet. A hot mixture and a cool glass container could lead to breakage.
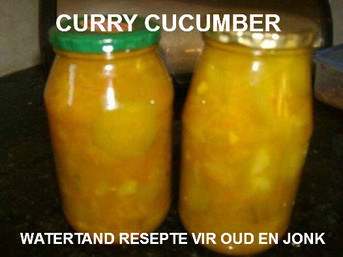
CURRY CUCUMBER
CURRY CUCUMBER
INGREDIENTS:
1kg Cucumbers (cut in circles or bite size);
500g Onions (cut in rings or chopped);
250ml Water;
500ml White Vinegar;
250 ml Sugar
30ml Curry Powder;
10ml Mustard Powder;
30ml Corn, Flour (Maizina);
Salt:
METHOD:
Boil onions and cucumbers until soft and tender;
add salt and sugar to corn flour,
mix curry and mustard with a bit of water and add to corn flour mixture.
Add to onions mixture and bring back to boil.
Bottle in sterilised jars whilst piping hot.....
ENJOY!!
Bron: (Aunt Anita) - TDC
Plasing & Foto: Tina De Comarmond / WATERTAND RESEPTE VIR OUD EN JONK
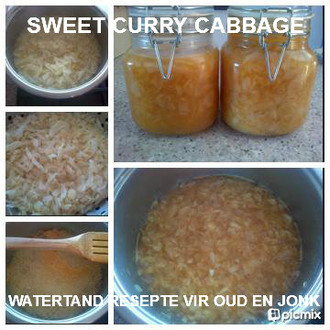
SWEET CURRY CABBAGE
SWEET-CURRY-CABBAGE
INGREDIENTS:
1,5kg Cabbage, finely sliced
2 Medium sized onions, roughly chopped or think rings (I use 2 large onions)
650ml Sugar
30ml Maizena
15ml Curry (Hot or Mild your choice)
15ml Mustard powder
10ml Salt
600ml White vinegar
METHOD:
Put sliced cabbage and chopped onions in a large pot
Cook until soft
Remove from heat and drain well
Mix sugar, maizena, curry, mustard powder and salt with a bit of vinegar
Add rest of vinegar to the mix, put it all in a large pot and cook for 5 minutes
Add cabbage mix to the curry syrup and cook through
Bottle hot cabbage in sterilized bottles
Keep opened bottles in fridge and unopened bottles should keep for approx 2 months.
Makes approx 1lt
TDC NOTES:
I keep open and un-opened bottles in the fridge
Oh yes, and the wooden spoon stopped the curry syrup to over-boil
Bron: TDC
Plasing & Foto: Tina de Comarmond / WATERTAND RESEPTE VIR OUD EN JONK
QUICK PICKLED SWEET CUCUMBERS
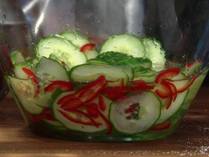
Ingredients
1 hothouse cucumber, finely sliced
1/2 Fresno chile, halved lengthwise, seeded if desired and finely sliced
1 cup white vinegar
3/4 cup sugar
1 teaspoon kosher salt
Directions
Add the cucumber slices and chile slices to a medium bowl and toss to combine.
In a medium saucepan, add the vinegar, sugar, 1/2 cup water and salt. Heat gently, stirring, just until the sugar and salt dissolve. Pour over the cucumbers and chiles in the bowl. Set aside to marinate at least 15 minutes before serving
SWEET CHILE CUCUMBER PICKLES
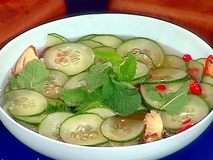
Ingredients
2 hot house cucumbers, thinly sliced
2 fresh hot red chiles, thinly sliced
2 large handfuls fresh mint leaves
2 cups rice vinegar
4 teaspoons sugar
Salt and freshly ground black pepper
Directions
Combine the cucumbers, chiles, and mint in a mixing bowl. Pour in the vinegar, sprinkle with the sugar, salt, and pepper. Toss everything together so the cucumbers are well coated with the vinegar. Refrigerate overnight if possible; the cucumbers will soften as they marinate and the flavors will deepen.
VIETNAMESE STYLE CUCUMBER PICKLE
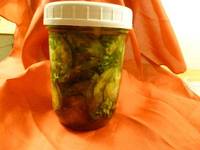
2 large cucumbers, peeled, seeded and cut into large dice
3 green onions, chopped small
3/4 cup of vietnamese-style fish sauce (Nuoc Mam)
3 limes, juice of
1 tablespoon of fresh minced cilantro
1 -2 teaspoon chili-garlic sauce (Tuong Ot Toi Vietnam)
Directions:
1.Combine the above ingredients and allow to marinate overnight. Makes approximately 2 cups.
3 green onions, chopped small
3/4 cup of vietnamese-style fish sauce (Nuoc Mam)
3 limes, juice of
1 tablespoon of fresh minced cilantro
1 -2 teaspoon chili-garlic sauce (Tuong Ot Toi Vietnam)
Directions:
1.Combine the above ingredients and allow to marinate overnight. Makes approximately 2 cups.
CURRY PICKLES SLICES
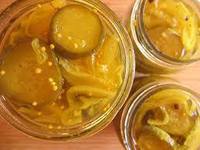
Ingredients:
8 cups pickling cucumbers, sliced
3 small onions
1 tablespoon pickling salt
2¾ cups cider vinegar
1¾ cups sugar
1 tablespoon curry powder
2 teaspoons pickling spice (you can buy it, or you can make your own)
1 teaspoon each: celery seeds and yellow mustard seeds
Directions:
Remove the cucumber ends and then cut into thick slices. Thinly slice your onions and place with the cucumber in a large non-reactive bowl. Sprinkle with pickling salt and let stand, covered, for 24 hours.
Drain the cucumbers and rinse them twice with cold water, draining thoroughly.
Combine your remaining ingredients: vinegar, sugar, curry powder, pickling spice, celery and yellow mustard seeds — and bring to a boil over high heat in non-reactive pan.
Add the cucumbers and onions and return just to a boil before removing from heat.
Remove hot jars from the canner and fill with vegetables, using a slotted spoon to remove from the pickling liquid. Pack into jars and pour in liquid, leaving 1/2 inch headspace.
Process 10 minutes for pint jars and 15 minutes for quart jars.
Note: I've increased the amount of pickling liquid in this recipe adaptation as I always seem to be just a little bit short, and it is much better to have an excess than not enough to properly pickle all your hard work.
CHA CHA/ CHOW CHOW
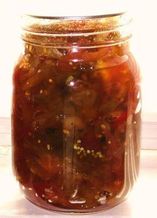
Here is Cha Cha/Chow Chow recipe I jotted down but I added a few items we love:
1. Salt 3 heads of shredded or sliced cabbage.
2. Let the cabbage sit in the salt for 2-3 hours.
3. Rinse cabbage and drain well.
4. In a big ole stock pot add:
Cabbage
6 c. sugar
4 c. apple cider vinegar
3 c. water
3 c. sweet onions
6 tbsp pickling spice
2 chopped Jalapenos (peppers to your taste)
1 chopped cayenne
1 habenero
2 c. sweet bell peppers
**Optional!!! We added a few green tomatillos to this batch.
5. Cook for 2 hours.
6. Add 5-6 quartered red tomatoes and green tomatoes.
7. Cook 25 minutes. Watch the bottom of the pot carefully. Don't burn all that goodness!!
8. It's ready to serve!
It's a Side! It's a condiment! Enjoy!!!
CHOW CHOW
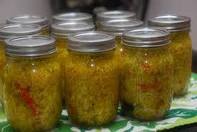
This chow chow recipe makes six pints.
Ingredients:
9 lbs of green tomatoes
6 lbs of yellow or white onions, peeled and finely diced
1 cup of salt
6 cups of water
4 cups of white vinegar
4 tablespoons of pickling spices
2 1/2 lbs white sugar
2 1/2 lbs light brown sugar
1/2 cup of cornstarch
2 teaspoons of dry mustard
1 teaspoon turmeric
1 red bell pepper, seeded and finely diced
4 cloves of garlic, peeled and finely minced
Directions:
Put the green tomatoes and onions in a large bowl and add 4 cups of the water and all of the salt. Allow the mixture to sit over night (or at least 8 hours, though 12 hours is preferable), covered in the refrigerator.
Drain well in a colander and then put the tomatoes and onions in a large pot with vinegar, two cups of water and pickling spice.
Bring to a boil over high heat and then reduce heat to low and simmer for 30 minutes. Add the white and brown sugars and allow to simmer for another 30 minutes.
In a small bowl, combine the cornstarch, mustard and tumeric and slowly add it to the simmering pot, making sure that it gets well combined. Add the diced red bell pepper and garlic and simmer for another 1 1/2 to 2 hours or until thick. Finally, spoon the chow chow recipe into tupperware in the fridge or in the freezer to be kept for up to 6 months.
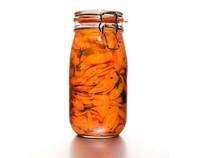
PICKLED CARROTS
Ingredients
7 medium carrots (about 1 1/4 pounds), sliced 1/4 inch thick
4 sprigs dill
3/4 cup white wine vinegar
1/3 cup sugar
Kosher salt
1 teaspoon dill seeds
1/2 teaspoon caraway seeds
Coarsely ground pepper
Directions
Bring a medium pot of water to a boil. Add the carrots and cook until crisp-tender, about 1 minute. Drain and rinse under cold water until cool. Pack the carrots and dill sprigs into a 1-quart jar.
Make the brine: Combine the vinegar, 3/4 cup water, the sugar, 2 1/2 teaspoons salt, the dill seeds, caraway seeds and 1/4 teaspoon pepper in a medium saucepan and bring to a boil.
Pour the hot brine into the jar and let cool completely. Cover and refrigerate overnight or up to 1 week.
FRESH CORIANDER CHUTNEY
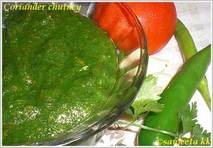
A bunch of fresh coriander leaves
1 medium size tomato (sour variety)
1 green chilly
D cloves of garlic (optional)
½ tsp of cumin seeds (jeera)
Salt as required
pinch of asafoetida (hing) ????
Method: Pluck the coriander leaves and wash under running water. Mix all ingredients and grind it to a fine paste. Store in a glass bottle and keep in refrigerator. Stays good for a week.”
CHILLI & PAWPAW CHUTNEY
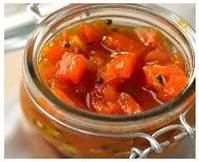
Makes approximately 5 cups of chutney which can be kept up to 6 months
Ingredients:
7 Black Peppercorns
1 Whole Nutmeg
1 Pawpaw, peeled and coarsely chopped
2 Apples, peeled and coarsely chopped
2 Tomatoes, peeled and coarsely chopped
500 ml (2C) Huletts Yellow Sugar
750 ml (3C) White Vinegar
10 ml(2t)Coarse Salt
3 Fresh Red Chillies, deseeded and finely chopped
10 ml (2t)Fresh Grated Ginger
close
Method:
Combine all the ingredients in a saucepan.
Stir constantly until the sugar is dissolved.
Let the chutney simmer uncovered for approximately 1 ½ hours or until it has thickened.
Remove peppercorns and nutmeg.
Spoon the hot chutney into hot sterilised jars.
Seal the jars while they are still hot.
Huletts recipe
EASY THAI SWEET CHILLI SAUCE
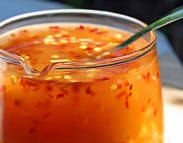
Instead of buying sweet chili sauce, try making this easy recipe! It only takes a few minutes to put together, and you can find everything you need for it in your pantry or at your local supermarket. There are no added chemicals or unhealthy ingredients in this homemade version, so it's also healthier. Thai sweet chili sauce makes a superb condiment for many Thai dishes - excellent with chicken and fish as well as seafood. Also wonderful as a marinade for grilling or as a dip for finger foods. Try it with grilled fish, chicken or chicken wings, shrimp, spring rolls, fresh rolls, etc... Enjoy!
Prep Time: 2 minutes
Cook Time: 15 minutes
Total Time: 17 minutes
Yield: Makes 1/2 Cup of Sauce
Ingredients:
1/2 cup rice vinegar (or substitute white vinegar)
1/2 cup + 2 Tbsp. white sugar
1/4 cup water
3 Tbsp. fish sauce
2 Tbsp. sherry (or cooking sherry)
3 cloves garlic, minced
1/2 to 1 Tbsp. dried crushed chili (1 Tbsp. makes spicy-hot sauce)
1+1/2 Tbsp. cornstarch dissolved in 3-4 Tbsp. cool water
Preparation:
Place all ingredients - except the cornstarch-water mixture - in a sauce pan or pot. Bring to a rolling boil.
Reduce heat to medium and let boil for 10 minutes, or until reduced by half. (Note that the vinegar will be quite pungent as it burns off. Generally, I find rice vinegar less strong than regular white vinegar).
Reduce heat to low and add the cornstarch-water mixture. Stir to incorporate and continue stirring occasionally until the sauce thickens (about 2 minutes).
Remove from heat and taste-test. You should taste "sweet" first, followed by sour, then spicy and salty notes. If the sauce isn't sweet enough, add a little more sugar. If not spicy enough, add more chili.
Pour sauce into a small bowl or jar and serve as a condiment with chicken, fish, and seafood, or as a dip with finger foods such as chicken wings, shrimp, or spring rolls. Also makes an excellent marinade for grilled chicken, fish, or seafood. ENJOY!
CHILLI SAUCE

1 cup tomato sauce
1/4 cup brown sugar
2 tablespoons vinegar
1/4 teaspoon allspice
.Directions
1.Stir the tomato sauce, brown sugar, vinegar, and allspice together in a mixing bowl until thoroughly blended. Pour into a covered container, and refrigerate until ready to use.
1/4 cup brown sugar
2 tablespoons vinegar
1/4 teaspoon allspice
.Directions
1.Stir the tomato sauce, brown sugar, vinegar, and allspice together in a mixing bowl until thoroughly blended. Pour into a covered container, and refrigerate until ready to use.
CHILLI SAUCE
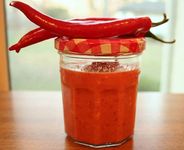
(for Hainanese Chicken Rice)
◦long, red chillies, fresh, about 8-10 (see photo)
◦ginger, 1 1/2 inches worth
◦garlic, about 5 cloves
◦rice vinegar, as needed, approx. 1/4 cup
◦sesame oil, 1 tsp
◦lime juice, about 1 tbsp
◦salt, 2 tsp
◦sugar, 1 tsp
◦chicken soup, boiling – a few tbsp
1.Prepare the chillies, de-stem and chop roughly
2.Skin the ginger and chop, same as the garlic
3.Place chillies, ginger, garlic, lime juice, salt, sugar, vinegar in small food processor and blitz to a vivid, red sauce, with no chunky bits
4.Add sesame oil and whizz again. Add a bit of the chicken soup (boiling hot)
5.As Gordon Ramsay commands, ‘Taste, and taste again!’ The final result should be hot but not overpowering, tangy and gingery
6.Steam a clean jam jar to sterilize it and bottle the sauce
7.Should keep in the fridge for a couple of weeks. I use it as a condiment to pep up dishes, including turkey sandwiches.
HOMEMADE SWEET CHILLI SAUCE
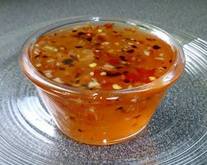
Buying the bottled Sweet Chili Sauce used for marination and glazing is good. But making your own sauce with fresh ingredients is even better. Here is my Sweet Chili Sauce recipe:
Ingredients:
1/3 cup apple cider vinegar
1/4 cup of water
1/2 cup of sugar
2 fresh hot peppers minced
2 cloves fresh garlic minced
1/4 tsp salt
1 tsp cornstarch
Directions:
In a saucepan, combine the water, vinegar and sugar over medium heat.
Mix together until well blended. Bring to a boil until the sugar dissolves.
Add the hot pepper, garlic and salt and stir until it all boils for about 1 min.
Add the cornstarch and continue to boil until everything has blended in.
Allow this to cool before you use it for a marinade.
If you are going to use this sauce for a barbecue glaze, cooling is not necessary.
This makes about 1/2 cup of sauce.
This sauce is great over BBQ'd or baked chicken and as a dipping sauce for lumpia (Asian springrolls).
Homemade Sweet Chilli Sauce
500g long fresh red chillies, stems trimmed
3 garlic cloves, peeled
750ml white vinegar
645g caster sugar
1. Halve 100g of the chillies and place in the bowl of a food processor. Halve and deseed the remaining chillies. Coarsely chop and place in the food processor. Add garlic and 250ml white vinegar. Process until finely chopped.
2. Place the chilli mixture, remaining vinegar and caster sugar in a large saucepan over a low heat. Cook, stirring, for 5 minutes or until the sugar dissolves.
3. Increase heat to high and bring to the boil. Reduce heat to medium and simmer, stirring occasionally, for 35-40 minutes or until the sauce thickens. Pour into sterilised airtight bottles and seal.
Recipe by Michelle Southan – Good Taste Magazine
BARBECUE-HONEY AND SWEET CHILLI MARINADE
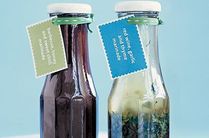
Ingredients
2/3 cup barbecue sauce
1/2 cup sweet chilli sauce
2 tablespoons honey
1 tablespoon peanut oil
Step 1
Combine barbecue sauce, sweet chilli sauce, honey and peanut oil in a bowl. Whisk until well combined. Store in a 1-cup capacity sterilised jar in the refrigerator for up to 7 days before using
Super Food Ideas -Recipe by Alison Roberts
HOMEMADE DILL PICKLES
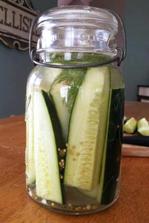
Makes 1 quart sized jar
Ingredients:
cucumbers
2 cloves of garlic
2 sprigs of fresh dill (the flowered heads of the dill taste the best for these pickles, so use them if you can get them)
½ tsp coriander seeds
¼ tsp mustard seeds
¼ tsp whole peppercorns
1/8 tsp red pepper flakes
2 cups of water
1 T sea salt
optional ingredients:
handful of fresh grape, raspberry, oak, blackberry or cherry leaves (these types of leaves supply tannins, which help keep the pickles crispy and crunchy)
onion or a clean rock piece to weigh the cucumbers down and keep them submerged in the brine
DIRECTIONS:
Decide what size pickles you would like and cut your cucumbers into your desired size. Keep in mind that sliced cucumbers will ferment faster than whole cucumbers. Pack your cucumber slices into your jar. Pack them tight! Add the spices on top. Mix the water and sea salt together until the salt is dissolved. Pour your water/salt over the pickles. Leave about an inch of space between the water and the top of the jar. All the cucumbers must be submerged in the water. If you are having trouble getting them totally submerged, you may need to add a “weight” to the jar to keep them submerged. I like to add a big chunk of onion. Not only does the onion give great flavor, but it does a good job of keeping the cucumbers under the water. You may also add a clean rock if you don’t want to use an onion.
Put a top on your jar and leave on the counter for 3 days. Test a pickle on day 3. If it is to your liking, put the jar in the fridge. This stops the fermentation process. You won’t have to worry about keeping the pickles submerged once they go in the fridge. If the pickles are not to your liking, keep testing them each day. You know they are perfect when they taste great to you and they still have their crunch. If you leave them out on the counter too long, they will lose their crunch and get really soft so it’s important to put them in the fridge when they are to your liking. No one likes a limp pickle
If you start to see a white film or mold on top, just skim it off. It is harmless (just yeast!), but it will impact the taste of the pickles, so you want to skim it off as soon as you see it.
Your pickles will keep for 6 months in the fridge. Enjoy!
DILL SUN PICKLES
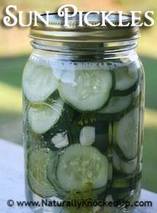
Ingredients
•6½ cups water
•3¼ cups white vinegar
•⅔ cup canning salt
•4-6 cloves of garlic (you can add more if you really like garlic)
•⅛ tsp. alum (I’ve been leaving this out with no ill effects)
•about 10 medium pickling cucumbers
•fresh dill, about 8-10 heads
Method of Preparation
1.Either slice or spear each cucumber.
2.Chop garlic into somewhat smallish pieces.
3.Pour water, vinegar, salt, and alum into a large mixing bowl or one gallon jar. Stir to dissolve salt.
4.Place a head of dill into a one quart jar along with half a chopped garlic clove. Add pickles until half full.
5.Repeat layering and pour water mixture over cucumbers and place lid on jar.
6.Set out in the sun for 2-3 days, chill and enjoy!
Notes
Now for some major tips to make these pickles last for about 6 months: If your cucumbers were picked the day you make them, just wash and slice. If you don’t know when they were picked or were picked previously, soak for about an hour in ice water to re-crisp them. Otherwise they may go soggy to soon. Use a double lid with ring and rubber seal. (canning lids) This helps with the fermentation by letting air out but not in. Do not open the lid to taste test during the 2-3 days period. Only open and enjoy when you’ll be eating the entire jar within a couple weeks. The sun part is most likely not necessary, since I have seen other recipes that are extremely similar and they just keep them inside. Although I do love the faded effect these pickles get from the sun, so mine always sit outside! *Nourishing Notes: Use organic vinegar as non-organic may be from GMO corn. Use celtic sea salt as a healthier option to refined white salt.
HOMEMADE SPICY DILL PICKLES
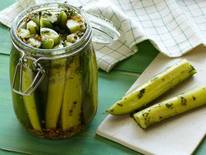
Ingredients
4 cups rice wine vinegar
2 tablespoons honey
1/2 teaspoon red pepper flakes
1 teaspoon whole white peppercorns
1 teaspoon coriander seeds
1 teaspoon mustard seeds
1/2 teaspoon fennel seeds
1/2 teaspoon toasted cumin seeds
1 tablespoon kosher salt
2 tablespoons coarsely chopped fresh dill
2 tablespoons coarsely chopped cilantro leaves
2 unpeeled English cucumbers, washed, cut in 1/2 horizontally then quartered lengthwise
Directions
Combine the vinegar, honey, pepper flakes, peppercorns, coriander, mustard seeds, fennel seeds, cumin and salt in a medium non-reactive saucepan over high heat and bring to a boil. Let boil for 2 minutes; remove from the heat and let sit until cooled to room temperature. Add the dill and cilantro. Place the cucumber in a medium bowl and pour the cooled vinegar mixture over them. Refrigerate, covered for 24 hours or up to 4 days.
TRADITIONAL DILL PICKLES
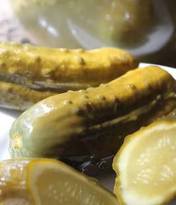
Ingredients:
fresh grape vine leaves, de-stemmed and rinsed
fresh dill leaves, chopped stems and/or seeds
2 ounces of mixed pickling spices (optional)
12 lbs. freshly picked, small cucumbers
Pickling solution:
2 gallons cold water
1 pint of white vinegar
1 lb of pickling or plain salt
Directions:
In a 4 gallon ceramic crock with lid, place a fully overlapping layer of grape vine leaves. Grenache was the variety prefered in the Barossa Valley but any grape vine leaves will do, as long as they have not been sprayed or exposed to chemicals. Then add a good layer of dill leaves, stems and/or seeds. Over these, scatter 1 oz. of mixed pickling spices. (This is optional as some people preffered to add only 4-6 cloves of chopped garlic.)
Fill with evenly sized cucumbers to within 2 or 3 inches of top.
Scatter another ounce of spices, another layer of dill, and then a good layer of grape vine leaves. Over this, pour the pickling mixture of 2 gallons of filtered cold water (do not use chlorinated or treated tap water or the pickles will not ferment properly), 1 pint of white vinegar, and 1 pound of salt.
Weigh down using a heavy crockery plate or a dish with a brick or stone over the top. If a stone is used, be sure it isn't limestone. The pickles need to be weighted down to keep them submerged under the liquid.
If the temperature is kept about 86 F, fermentation will be complete within about 2 weeks (if cooler, fermentation will take longer). Pickles should become a ditinctive yellow/grey-green, but should not be at all slimy. At the end of the curing, the pickles may be bottled in sterilized jars. Pack the jars with cured pickles. Then fill the sterile jars with fresh pickling brine, flavored with a little spice and dill. It was traditional to put a vine leaf or two from the pickle crock on top of the pickles in the jar as this would help stop discoloration and oxidation.
This is an old recipe, which uses a traditional method of making fermented pickles and does not call for additional processing. If proper techniques and good kitchen hygene are used, the traditional method of making pickles may be used with good success. New recommendations, however, call for pickles to be processed in a boiling water bath for 10 minutes (600ml/1pint jars) to 15 minutes (1lt/1quart jars) leaving 6mm (1/4") headspace in the jars. This will alter the texture of the finished product somewhat but shouldn't alter the taste too much.
HOMEMADE PICKLING SPICE
2 tablespoons of Mustard Seed
1 tablespoon of Whole Allspice
2 teaspoons of Coriander Seeds
2 teaspoons of dried Garlic Flakes
1 teaspoon of Ground Ginger
1 teaspoon of Dried Red Pepper Flakes
1 dry Bay Leaf, chopped or crumbled
1 Cinnamon Stick (2") chopped or crumbled
Combine all ingredients and store in an airtight jar or container. Use in your favorite pickle recipes.
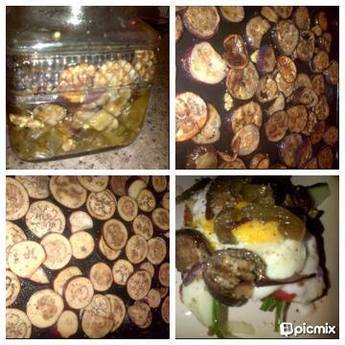
MARINATED EGGPLANT
MARINATED EGGPLANT
INGREDIENTS
500ml white wine vinegar
125ml water
2 (about 880g) eggplant, cut crossways into 5mm-thick slices
2 tbs extra virgin olive oil
1 tbs dried oregano leaves
2 tsp dried thyme leaves
1/2 tsp dried chilli flakes
Freshly ground black pepper
250ml canola oil
80ml extra virgin olive oil, extra
METHOD:
Step 1 Sterilise a 750ml large wide neck jar (see note).
Step 2 Meanwhile, combine the vinegar and water in a large saucepan and bring to the boil over high heat. Add half of the eggplant and simmer, uncovered, turning occasionally, for 1-2 minutes or until just tender. Use tongs to transfer the eggplant to a baking tray lined with paper towel. Repeat with the remaining eggplant.
Step 3 Preheat a barbecue grill or large chargrill on medium-high heat. Brush half the eggplant slices lightly with olive oil on both sides. Cook on preheated grill for 1-2 minutes each side or until golden brown. Transfer to a plate. Repeat with remaining eggplant and olive oil.
Step 4 Combine the oregano, thyme and chilli flakes in a small bowl. Season with pepper. Place 3-4 eggplant slices in the base of the sterile jar, and sprinkle with a little herb mixture. Continue layering, finishing with a layer of eggplant.
Step 5 Heat the canola oil and extra oil in a small saucepan over medium heat for 1 minute or until just warmed through. Carefully pour over the top of the eggplant, making sure the eggplant slices are covered. Seal with the lid and set aside to cool to room temperature. Place in the fridge for 1-2 days to allow the flavours to develop. Store in the fridge.
Notes
To sterilise, wash the jar and lid in warm, soapy water and rinse well. Place in a large saucepan, cover with water and bring to the boil. Boil for 10 minutes. Place on a tray lined with baking paper or newspaper. Place in oven preheated to 150°C until dry. Use the jars straight from the oven.
TDC NOTES
1. I've used baby aubergines and shortened the time
Bron: Australian Good Taste - Recipe by Kerrie Mullins
Plasing & Fotos : Tina De Comarmond / WATERTAND RESEPTE VIR OUD EN JONK
PICKLED EGG & SAUSAGE EGGS
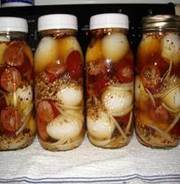
pounds Linguica Links, Cut Into 1" Pcs.[hier sal ek Chorizo worsies gebruik]
30 whole Hard Boiled Eggs, Free Range
1 whole Onion, Sliced Lengthwise
4 teaspoons Crushed Red Pepper Flakes
FOR THE BRINE:
½ cups Brown Sugar
2 Tablespoons Mustard Seed
1 Tablespoon Fennel Seed
1 Tablespoon Coriander Seed
1 Tablespoon Kosher Salt
4 cups Cider Vinegar
2 cups White Vinegar
1 cup Water
4 whole Bay Leaves
5 whole Star Anise
Mix brine ingredients in a large stockpot. Bring to a boil to dissolve everything and then remove from heat and cool.
Bring a pot of water to boil and cook linguica slices for 5 minutes to remove fat. Drain.
In four 1-quart mason jars; layer sliced onion, eggs and linguica until the jar is full. Cover the mixture with the brine and add 1 teaspoon of crushed red pepper flakes per jar and spoon in the leftover spices from the brine. Make sure each jar gets a star anise.
Refrigerate for at least a day. These are great within hours of making and they are very hard to stay out of.The eggs make wicked good egg salad!Keep refrigerated.
BRON:tasty foods*
PINK PICKLED EGGS
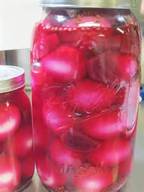
6 hard-boiled eggs – peeled.
1 cup cider vinegar
1 can whole beets with liquid (approx. 1 cup)
1/3 cup granulated sugar
1/2 tsp salt
1 small onion - chopped
4 whole cloves
shredded lettuce or greens
Place peeled eggs (whole) in a bowl or jar.
Mix vinegar, beet liquid, sugar, salt, onion, and cloves; pour over eggs. Add beets.
Cover and refrigerate 2 to 3 days. Slice eggs and beets; serve on a bed of lettuce or greens.
BRON:*Squido
PICKLED EGG'S*
1.Turn on your cooker / light the gas.
2.Put saucepan over the heat.
3.Put water in the saucepan (boil this beforehand using the kettle if you want to save time).
4.Add a few tablespoons of vinegar to the water. This will coagulate any egg white if the egg should break and leak its contents.
5.Add the eggs, one at a time, gently lowering them into the water with the big spoon. If any crack, the vinegar will stop the white from spreading.
6.Boil the eggs for 7 minutes. Half way through the boil, gently move the eggs around in the pan to make sure they get even heating. You can boil them for longer if you have a large number of eggs in one pan as these will lower the water temperature when added.
7.Remove the eggs from the heat.
8.Pour most of the water away and run the eggs (still in the pan) under cold running water to stop them cooking (this also stops the grey coating you sometimes get between the yolk and the white).
9.Using a spoon, crack the eggs all the way round (but don't peel yet) and leave them in the cold water to cool. This lets water in under the shell and helps when peeling by lifting the shell away from the egg.
10.If the eggs heat the cold water, which they probably will, replace the water with more cold as necessary.
11.Once cold, peel the eggs and place them into the colander to dry.
12.Put the dry eggs into your clean dry jar, trying not to touch them.
Pickling Vinegar
1.You will need a lot less vinegar than you think, remember, most of the jar is taken up with eggs.
2.You can add ingredients to cold vinegar, but we tend to add then to the boiling liquid, this seems to help the flavour permeate the vinegar.
3.Always mix the vinegar with your flavourings before adding to the jar. If you add them separately you tend to get clumping of flavourings which can flavour one egg more than others.
4.Pour the cold mixture over the eggs, making sure you cover them completely. If you have too much vinegar you can sieve it and add the remaining solid ingredients to the jar at the end. The eggs at the top will sink as time goes by, so don't worry if some float.
5.Seal the lid tightly.
6.Store the jar in a cool / dark cupboard for six weeks. Try not to move it.
CURRIED PICKLED EGGS
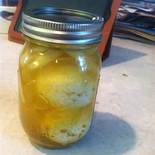
1 cup cider vinegar
3/4 cup water
1/4 onion, sliced
3/4 cup white granulated sugar
3 cardamom pods
1 teaspoon mustard seeds (yellow or brown)
1 Tbsp yellow curry powder
6 hard cooked eggs**, peeled
3/4 cup water
1/4 onion, sliced
3/4 cup white granulated sugar
3 cardamom pods
1 teaspoon mustard seeds (yellow or brown)
1 Tbsp yellow curry powder
6 hard cooked eggs**, peeled
BREAD AND BUTTER PICKLES
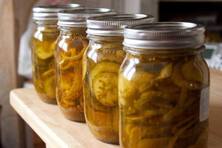
15 cups sliced pickling cucumbers
3 onions, thinly sliced
1/4 cup coarse salt
4 cups cracked ice
2 1/2 cups cider vinegar
2 1/2 cups sugar
3/4 teaspoon turmeric
1/2 teaspoon celery seed
1 tablespoon mustard seeds
Directions:
1.Combine cucumbers, onions, salt and ice in a large bowl.
2.Mix well.
3.Put a weight on and allow to stand 3 hours. (For a weight, I use a plate with a gallon bottle of vinegar or water on top of it).
4.Drain thoroughly.
5. Combine vinegar, sugar, turmeric, celery seed and mustard seed in a large pot.
6. Add drained cucumbers.
7.Place pot on medium low heat.
8. Bring almost to a boil, but DO NOT ALLOW TO BOIL.
9.Remove from heat.
10.Seal in sterilized jars, 10 minutes in a hot water bath.
11. Easy way to sterilize jars: Wash them well in hot soapy water.
12. Dry them off.
13. Put on a cookie sheet, right side up, at 225°F for 15 minutes.
14. Turn off oven and leave them in there until you need them.
PAPRIKA:
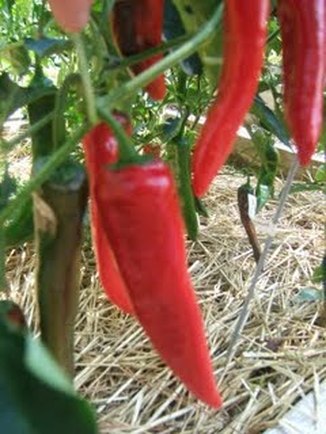
PAPRIKA
DRYING PAPRIKA PEPPERS
I love Paprika powder so I naturally wanted to try and make it myself. Not a bad little project to experiment with. Spices are always some what expensive and to produce something that I know we will use is just an added bonus.
Well I started to pull the peppers as they got red for drying last month. I hung them from the window sill for about 4-6 weeks. They had dried pretty well, though still probably could have dried a little more, when we decided to use them for Nicole's tamale recipe. I can tell you, the flesh of the pepper is thick. Not as thick as say a bell pepper, but thicker than a cayenne. So the drying time takes a little longer. A couple that I had opened had developed some mold inside toward the stem. This was due to the excess moisture and lack of rotation. The seed pods toward the top of the stem blocked out any light from the other sun exposed side, setting up the perfect conditions for mold growth. Lesson learned, don't attempt to dry a pepper this thick in a window!
To dry them properly, do the following and learn from my initial mistake:
Pick the Paprika peppers when they are red. Rinse them off and pat dry. (If buying at the store, buy organic so there is no pesticide residue to worry about.) Cut the peppers up and lay them skin side up on a tray lined with parchment paper. Place peppers in a 170 degree oven for about 8-10 hours (about 2 hours longer than a cayenne because they are so thick) until they are dry and wrinkled. (We don't do that with cayenne's are thin walled and they come out fine without cutting.) **If you are drying peppers for later use, you can dry them whole in the oven, just turn them half way through the process. Check to make sure they have dried completely before pulling them out to avoid any mold issues.
Next, let them rest on the counter top to cool and harden, which could take two or three hours. Use a coffee grinder or a food processor to grind up the peppers to a powder. (Remember while handling hot peppers, wear gloves to prevent the peppers from getting on your hands and never rub your eyes!) The less you grind the more of a flake you will get and the more you grind, it becomes a powder. Once you have grinded, let the Paprika powder rest in the grinder for 10-15 minutes before you open it up to prevent breathing the pepper dust. Then, place in a jar or bag for later use. It should last you 4-6 months if you keep the container sealed (If you have excess, freezing is an option to preserve the quality). Remember that flakes and powder will oxidize after a while and it will change the flavor and nutritional content. So when they start, discard them. Enjoy the happiness of making a much better tasting spice at home!
Bron: 180 Degrees Farm
Plasing: Henriette Wessels / WATERTAND RESEPTE VIR OUD EN JONK
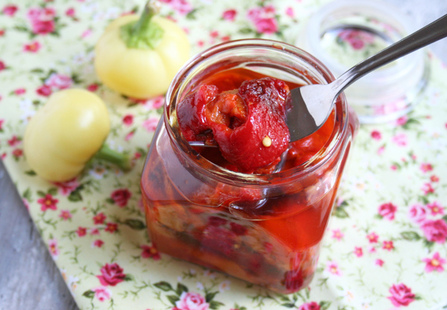
ROASTED SMOKY PAPRIKA PEPPERS
ROASTED SMOKY PAPRIKA PEPPERS
INGREDIENTS:
18 red, alma paprika peppers, or about 4-6 red sweet peppers (enough to fill one pint jar once roasted)
Apple cider vinegar
Kosher, real salt
1/2 cup extra virgin olive oil
1/2 garlic clove, sliced thinly
1/2 tsp smoked Spanish paprika
METHOD:
Infuse the Olive Oil
In a sauce pan, add 1/2 cup extra virgin olive oil, garlic, and smoked Spanish paprika. Heat gently for about 5 minutes, set aside to cool and allow the flavors to infuse the oil. Once cooled, strain through a fine sieve, coffee filter, or cheese cloth.
Once the Olive Oil is Infused
Wash, Dry and lightly oil your peppers.
Roast your peppers. You can do this over an open burner on a stove, a grill or broiled in the oven.
When the peppers are blackened, put them in a dish covered with a damp towel to seal in the steam for 20 – 40 minutes.
After the peppers have cooled, remove their skins, stems, seeds, and veins (which carry the most heat) and place them in a bowl. If using paprika peppers make sure to use gloves to prevent your hands from burning. DO NOT run the peppers under water as they will lose their flavor.
Once the peppers are clean and in the bowl fill a second bowl with apple cider vinegar.
Dip each pepper individually into the vinegar and place it into a separate bowl.
Once all of the peppers have been dipped in the vinegar, add salt to them and with your hands toss them like a salad.
Gather a clean pint sized canning jar (or any other jar to preserve them in) and add enough apple cider vinegar to cover the bottom.
Pack with the peppers leaving 1/2 inch space at the top.
Using a butter knife, run it down the sides of the jar to release any air bubbles. You will notice the level of the liquid will drop.
Once the air is out to the best of your ability add the infused olive oil to cover everything leaving 1/4? headspace.
Store in the fridge. It will last a year, although the peppers will soften over time.
Bron: The Humble Kitchen
Plasing: Henriette WEssels / WATERTAND RESEPTE VIR OUD EN JONK
QUICK BITE SIZE CHUNK PICKLES
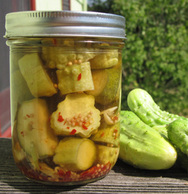
Sweet, Hot Chunk Pickles
1.5kg 3- to 4-inch pickling cucumbers, sliced
crosswise ½ inch thick, ends discarded
3 tablespoons pickling salt
2½ cups cider vinegar
2½ cups water
2/3 cup sugar
5 to 6 tablespoons diced fresh red hot peppers (such as Fresno, serrano, or jalapeño), or 2½ to 3
teaspoons hot pepper flakes
10 to 12 garlic cloves, sliced
2½ to 3 teaspoons yellow mustard seed
In a bowl, toss the sliced cucumbers with the salt.
Empty two ice cube trays over the cucumbers. Let them stand for three to four hours.
Drain the cucumbers, discarding any ice cubes that haven’t melted.
In a saucepan, bring the vinegar, water, and sugar to a boil, stirring to dissolve the sugar.
Into each of five clean, hot pint mason jars, put
1 tablespoon diced hot peppers (or ½ teaspoon pepper flakes)
2 sliced garlic cloves, and ½ teaspoon mustard seed.
Fill the jars loosely with the drained cucumber chunks.
If you have plenty of extra chunks (as is likely if your cucumbers were chubby), fill a sixth jar in the same way.
Pour the hot liquid over the cucumber pieces.
Shake the jars a bit and press on the cucumbers to settle them, leaving ½ inch headspace.
Release air bubbles by turning each jar and, if needed, pushing a pointed chopstick or similar tool down the inner surface of the jar.
Close the jars with two-piece caps.
Process the jars for 5 minutes in a boiling-water bath, or immerse them in water heated to 180 to 185 °F for 30 minutes.
Bron: A Gardener's Table
Plasing: Henriette Wessels
TOMATO:
GREEN TOMATO PRESERVES
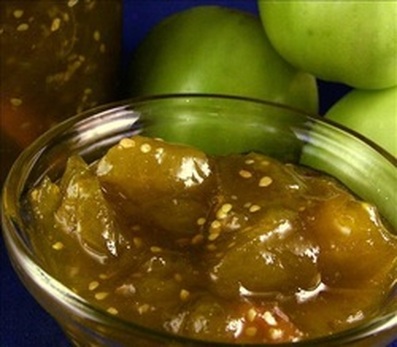
GREEN TOMATO PRESERVES
INGREDIENTS:
2kg green tomatoes
1 lemon, juice of
5 cups sugar
1/8 cup crystallized ginger to 1/4 cup crystallized ginger (optional)
DIRECTIONS:
Wash the tomatoes, core and cut into chunks; place in a large canning kettle.
Add the lemon juice and sugar, bring to a boil and continue boiling until syrup is thick.
Ladle into hot sterilized jars and process in water bath as recommended in your area.
Bron: Texas Recipe
Plasing: Henriette Wessels / WATERTAND RESEPTE VIR OUD EN JONK
GREEN TOMATO RELISH
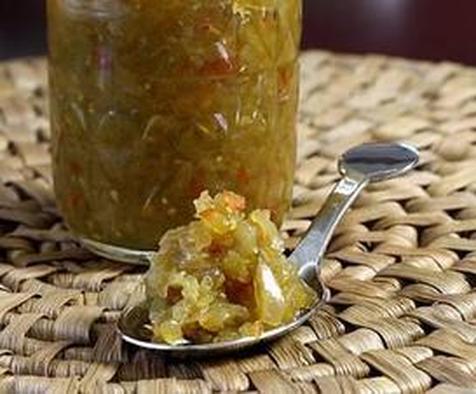
GREEN TOMATO RELISH
INGREDIENTS:
8 cups finely chopped (processed or ground) cored green tomatoes
2 cups finely chopped (processed or ground) peeled onions, bell peppers, part red, finely chopped (processed or ground)
1/3 cup pickling salt
2 tablespoons mixed pickling spices
1/2 teaspoon celery seed
1 clove
garlic, chopped
2 1/4 cups white vinegar
1 2/3 cups packed light brown sugar
DIRECTIONS:
Combine the chopped vegetables and salt in a large stainless steel pan.
Cover and let stand in a cool place (about 65° tF to 70° F) for 10 to 12 hours, or overnight.
Pour the vegetables in a colander over the sink and let drain.
Rinse with cool water and use your hands to squeeze out any excess liquids.
Tie the pickling spices and celery seeds in a cheesecloth spice bag.
In a large stainless steel or enamel-lined pan, combine the vinegar, the spice bag, chopped garlic, and the vinegar.
Put the vinegar mixture over high heat and bring to a boil, stirring until sugar is dissolved.
Add the drained green tomato mixture and bring the mixture to a boil.
Reduce heat to medium-low and boil gently, stirring often, for 1 hour.
While the mixture is cooking, prepare the work area, canner, jars, and lids.
Bron: Texas Recipe
Plasing: Henriette Wessels / WATERTAND RESEPTE VIR OUD EN JONK
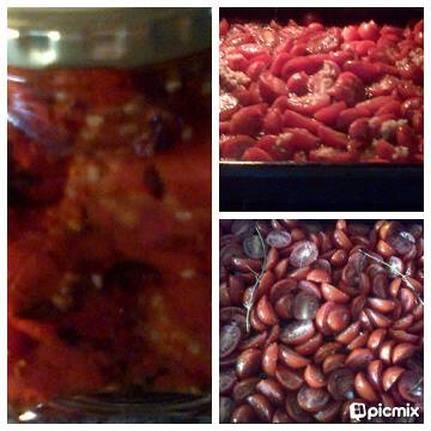
OVEN ROASTED TOMATOES
OVEN ROASTED TOMATOES
A bunch of tomatoes, any variety
Extra Virgin Olive Oil
Kosher Salt
Fresh Cracked Pepper
a bunch of garlic cloves
DIRECTIONS:
Preheat oven to 325*F
Cut your tomatoes. If you’re using small romas, just cut them in half.
Anything larger, quarter them.
Half Grape Tomatoes.
Place tomatoes in a large bowl.
Drizzle with olive oil (enough to coat everything) and sprinkle with salt and pepper. Lightly toss together, coating everything.
Arrange tomatoes in a single layer, skins down, on a cookie sheet lined with foil or parchment paper.
Mince garlic and sprinkle over tomatoes being careful to let most of it drop directly on the tomatoes .
Optionally, you can also put whole cloves still in the skin right on the pan.
Give it one more generous drizzle of olive oil.
Place in oven and cook for 2 1/2-3 hours, depending on the size of your tomatoes.
It usually takes about 3 for romas that are halved. If you quarter them they’ll get done a little faster.
You’ll want to just keep an eye on them after about 2 -2 1/2 hours.
Your house will smell like heaven.
Just take a peek through the window. You’ll see the juices have dried up and some of the tomatoes will start to get dark around the edges.
When they’re done they’ll kind of dried up, and blackened around the edges, but still soft. Eat one right away and see what I’m talking about. Amazing, right? I’m not joking. They’re amazing.
NOW WHAT DO I DO WITH THEM?
Good question. Mostly I just eat them right off the pan. Seriously.
But you can put them on sandwiches, on pasta, in panini, basically any way you’d use a normal tomato, or especially a sun-dried tomato.
The flavor and texture is very similar to a sun-dried tomato, only way better.
You can also puree them in a food processor with those garlic cloves. You’ll end up with a great garlicky tomato paste.
You can spread it on bread or add to any tomato based sauce or soup.
You can also freeze it and use it all winter long. Just break off a chunk and add to anything.
Or freeze in 1 T clumps so you’ll always have it measured out.
TDC Note:
I've added a few Thyme sprigs
Source: Unknown
Post & Photo: Tina de Comarmond / WATERTAND RESEPTE VIR OUD EN JONK
THICK TOMATO SALSA
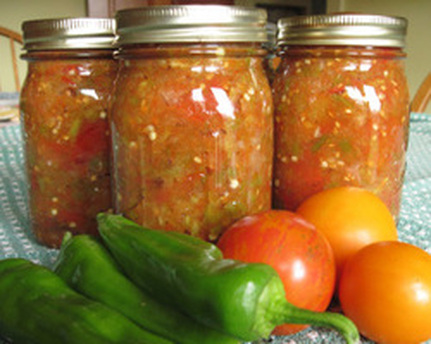
THICK TOMATO SALSA
2.5kg tomatoes, preferably no larger than
2 inches wide or long
1 kg green or ripe peppers, hot or mild, stemmed
500gr onions
1 cup lime juice
1 ½ tablespoons pickling salt
Heat the oven to 120°C. Halve the tomatoes, and cut out any thick cores.
Lay the tomato halves cut-side up in a single layer in two or three low-sided baking or roasting pans—glass, ceramic, or enameled pans will do.
Don’t add any oil; you want the tomatoes to dry out.
Bake them for about 3 hours, until they have noticeably shriveled but haven’t browned.
Drop the tomato pieces into a large nonreactive pot, halving any large ones with shears as you do so.
Seed the peppers or not, depending on your heat tolerance.
Then either mince the peppers and onions or chop them briefly in a food processor; be careful not to liquefy them.
Add them to the pot along with the lime juice and salt. Stir.
Bring the salsa to a simmer, and simmer it for 10 minutes.
Ladle the salsa into pint or half-pint mason jars, leaving ½ inch headspace.
Close the jars with two-piece caps, and process the jars in a boiling-water bath for 15 minutes.
Store the cooled jars in a cool, dry, dark place.
Makes about 3.6 litres
Bron: A Gardener's Table
Plasing: Henriette Wessels / WATERTAND RESEPTE VIR OUD EN JONK
TOMATO PEACH PRESERVES
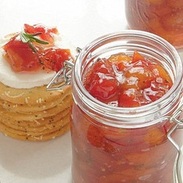
Ingredients:
2 1/4 cups peeled and diced peaches
2 1/4 cups seeded and diced plum tomatoes
1 1/2 cups sugar
3 tablespoons fresh lemon juice
1 package powdered fruit pectin
1 1/2 teaspoons minced fresh rosemary
1/2 teaspoon freshly ground pepper
Directions:
Stir together all ingredients except rosemary and pepper in a 4-qt. microwave-safe glass bowl.
Microwave at HIGH 8 minutes (mixture will boil). Stir mixture, and microwave at
HIGH 12 to 16 minutes or until thickened. (You're going for the viscosity of
pancake syrup here.
The mixture will thicken to soft-set preserves after it cools and chills.)
Stir rosemary and pepper into warm preserves. Cool mixture completely (about 2 hours).
Serve immediately, or cover and chill preserves in an airtight container until ready to serve. Store in refrigerator up to 3 weeks.
Bron: Texas Recipe
Plasing: Henriette Wessels
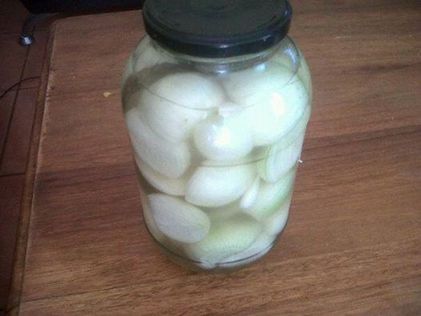
PICKLED ONIONS
PICKLED ONIONS
INGREDIENTS:
1/4 cup salt
1kg small pickling onions
12 birdseye red chillies
4 bay leaves
1 tablespoon peppercorns
4 cups white vinegar
1/2 cup white sugar
1 tablespoon pickling spice
METHOD:
Combine salt and 4 cups of water in a large glass bowl. Stir until salt dissolves. Peel skin from onions, leaving onions whole. Add to salted water. Cover. Stand at room temperature overnight.
Drain onions. Rinse under cold water. Pack into 4 x 3-cup capacity sterilised jars, layering with chillies, bay leaves and peppercorns.
Place vinegar, sugar and pickling spice into a saucepan over low heat. Cook, stirring, for 15 minutes or until sugar has dissolved. Bring to the boil. Simmer, uncovered, for 15 minutes or until syrup thickens slightly. Set aside to cool completely. Strain liquid. Pour over onions, making sure onions are completely covered. Seal jars. Allow to stand for 3 weeks before using.
Serve onions with cold ham, cheese, and crackers or bread.
NOTES:
It is important to sterilize jars to prevent mould forming. Jars can be sterilized in a number of ways. Firstly, choose glass jars with an airtight lid. Remove any old labels and ensure they are free from cracks or chips. Wash in hot soapy water and rinse, then sterilize using one of the following methods:
OVEN
Preheat the oven to 120C. Place jars (upright) and lids (separately) on an oven tray and heat in the oven for 20 minutes. Remove and fill immediately with jam or other preserves.
STOVETOP
Place jars and lids in a deep saucepan. Cover with cold water. Bring water to the boil over high heat, reduce heat to medium and boil for 10 minutes. Line a baking tray with paper towel. Remove the jars using metal tongs and allow to air dry or dry with a clean paper towel.
DISHWASHER
Place jars, lids and rubber seals in the dishwasher on the hottest cycle. Remove and place onto a paper towel-lined tray; the heat will dry them naturally or you can dry them with paper towel.
Bron: Super Food Ideas - Recipe by Dixie Elliott
Photo & Post : Tina De Comarmond / WATERTAND RESEPTE VIR OUD EN JONK
ZUCCHINI RELISH
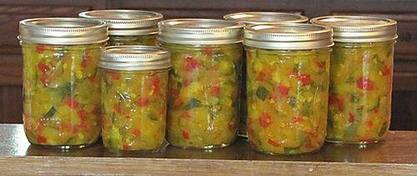
2 hours cook:
20 minutes yield:
4 pints
I usually double and triple my relish recipe and do a lot at one time.
INGREDIENTS:
2 cups chopped zucchini
1 cup chopped onion
½ cup chopped sweet green bell pepper
½ cup chopped sweet red pepper
2 TBSP canning salt
1 Cup sugar (do more or less to your taste)
2 teaspoons celery seed
1 teaspoon mustard seed
1 teaspoon dried mustard
1 cup cider vinegar
INSTRUCTIONS:
Combine zucchini, onion, green and red peppers, sprinkle with salt, cover with cold water and let stand 2 hours.
Drain, rinse and drain thoroughly.
Combine remaining ingredients in a large sauce pot. Bring to a boil. Add vegetables and simmer for 10 minutes. Pack hot relish into hot pint or ½ pint jars, leaving ¼ inch head space. Remove air bubbles. Adjust two piece caps.
Process 10 minutes in a boiling water canner.
Bron: Hillbilly Recipes
Plasing: Henriette Wessels / WATERTAND RESEPTE VIR OUD EN JONK
PESTO:
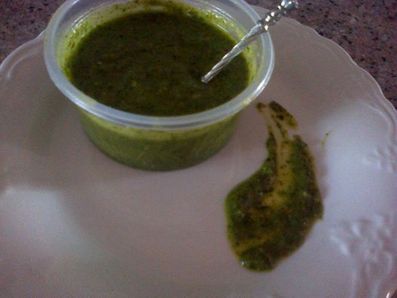
PARSLEY PESTO
PARSLEY PESTO
Preparation time: less than 30 mins
Makes 1 portion
Vegetarian
INGREDIENTS:
For the parsley pesto
30g flatleaf parsley leaves (no stalks)
1-2 garlic cloves, crushed
40g freshly grated parmesan
30g pine nuts
75ml extra virgin olive oil
salt
METOD:
1. Put all the ingredients except the oil and salt into the food processor. Whiz for a second or two, add the oil and a little salt. Taste and correct seasoning.
TDC NOTE:
Although the recipe says 1 portion (I suppose it is when you are going to make Parsley Pesto Pasta or Chicken etc) It yields approx 200ml Pesto.
Bron: by Darina Allen from Saturday Kitchen
Plasing: Tina De Comarmond / WATERTAND RESEPTE VIR OUD EN JONK